In Visible Studio room 2012 a new feature is presented known
as Desk Developer that is used in Information Application Development. Desk
Developer can be used to determine a table graphically. In Desk Developer the
Program Lite is used to upgrade the Desk Program meaning. The Program Lite can
also be used as an alternative to upgrade or change the Program straight. But
there is one essential thing to notice that Desk Developer only appears for the
information in SQL Hosting server 2012. You can either create a New Data source
or you can change the table or their related development item using Desk
Developer and then change to the Program Lite that will allow you to straight
change the script that describes this table.
Step 1
Start you Visual Studio 2012 and create a new project using the following:
- Now go to the Server Explorer and right-click to add a new database.
- Name this database as "Trade" or anything else as you like.
Step 2
Now we will use Table Designer to add a table using the following:
- First of all expand the Trade Node, this will show you the Tables Node, right-click on Tables and select "Add New Table".
- Now a new window will be opened. This Window is the Table Designer that will consist of a Columns Grid, Script Pane and Context Pane.
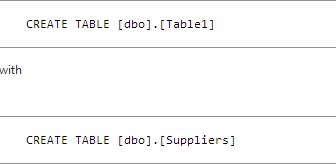
- In the Script Pane rename the new table to "Suppliers".
Step 3
- Click the empty row in the Columns Grid to add a new column to the table. Enter "CompanyName" for the "Name" field, "nvarchar (128)" for the "Data Type" and uncheck the "Allow Nulls" field. As you tab away from the fields, notice that the Script Pane is updated immediately.
- Add another new column. Enter "Address" for the "Name" field, "nvarchar (MAX)" for "Data Type" and uncheck the "Allow Nulls" field.
Step 4
Now add one more table named "Customer". This time, add the following columns to the Customer table using the Columns Grid. And remember to change the script so that the table's name is
[dbo].[Customer]
Step 5
Create one more table named "Products". Add the following columns to the Products table using the Columns Grid. And remember to change the script so that the table's name is
[dbo].[Products]
Step 6Now we will create a new Check Constraint using the Table Designer. The Table Designer's Context Pane gives you the Logical View of the Table Definition like Keys, Constraints, Triggers etc. and also enables you to select an object to highlight its relationship to individual columns.For the Product table right-click the "Check Constraints" node in the Context Pane of the Table Designer and select "Add New Check Constaint".- Notice that the node count automatically increments by 1.
- Click the Script Pane, and replace the default definition of the constraint with the following:
This Constraint will limit the value of ShelfLife to be under 5.
Step 7
Now we will create a Foreign Key reference using the Table Designer.
- For the Products table, right-click the "Foreign Keys" node in the Context Pane, and select "Add New Foreign Key" .
- Notice that the node count automatically increments by 1.
- Click the Script Pane, and replace the default definition of the foreign key reference with the following.

SPONSORS:
No comments:
Post a Comment